How to draw a person
Learn how to draw a person easily with JustSketchMe
Drawing a person, especially in an obscure pose, is pretty tough whether you’re just starting, or are experienced. The proportions of the human body need to be the correct ratio, the pose needs to be natural. Sometimes is just hard trying to start. With the aid of a wooden mannequin or the JustSketchMe web app, drawing a proportionally correct person is simple. This guide will talk you through it and give you some tricks to sketch out a person. You do not need to follow this guide verbatim. Try experimenting and drawing what you feel is right.

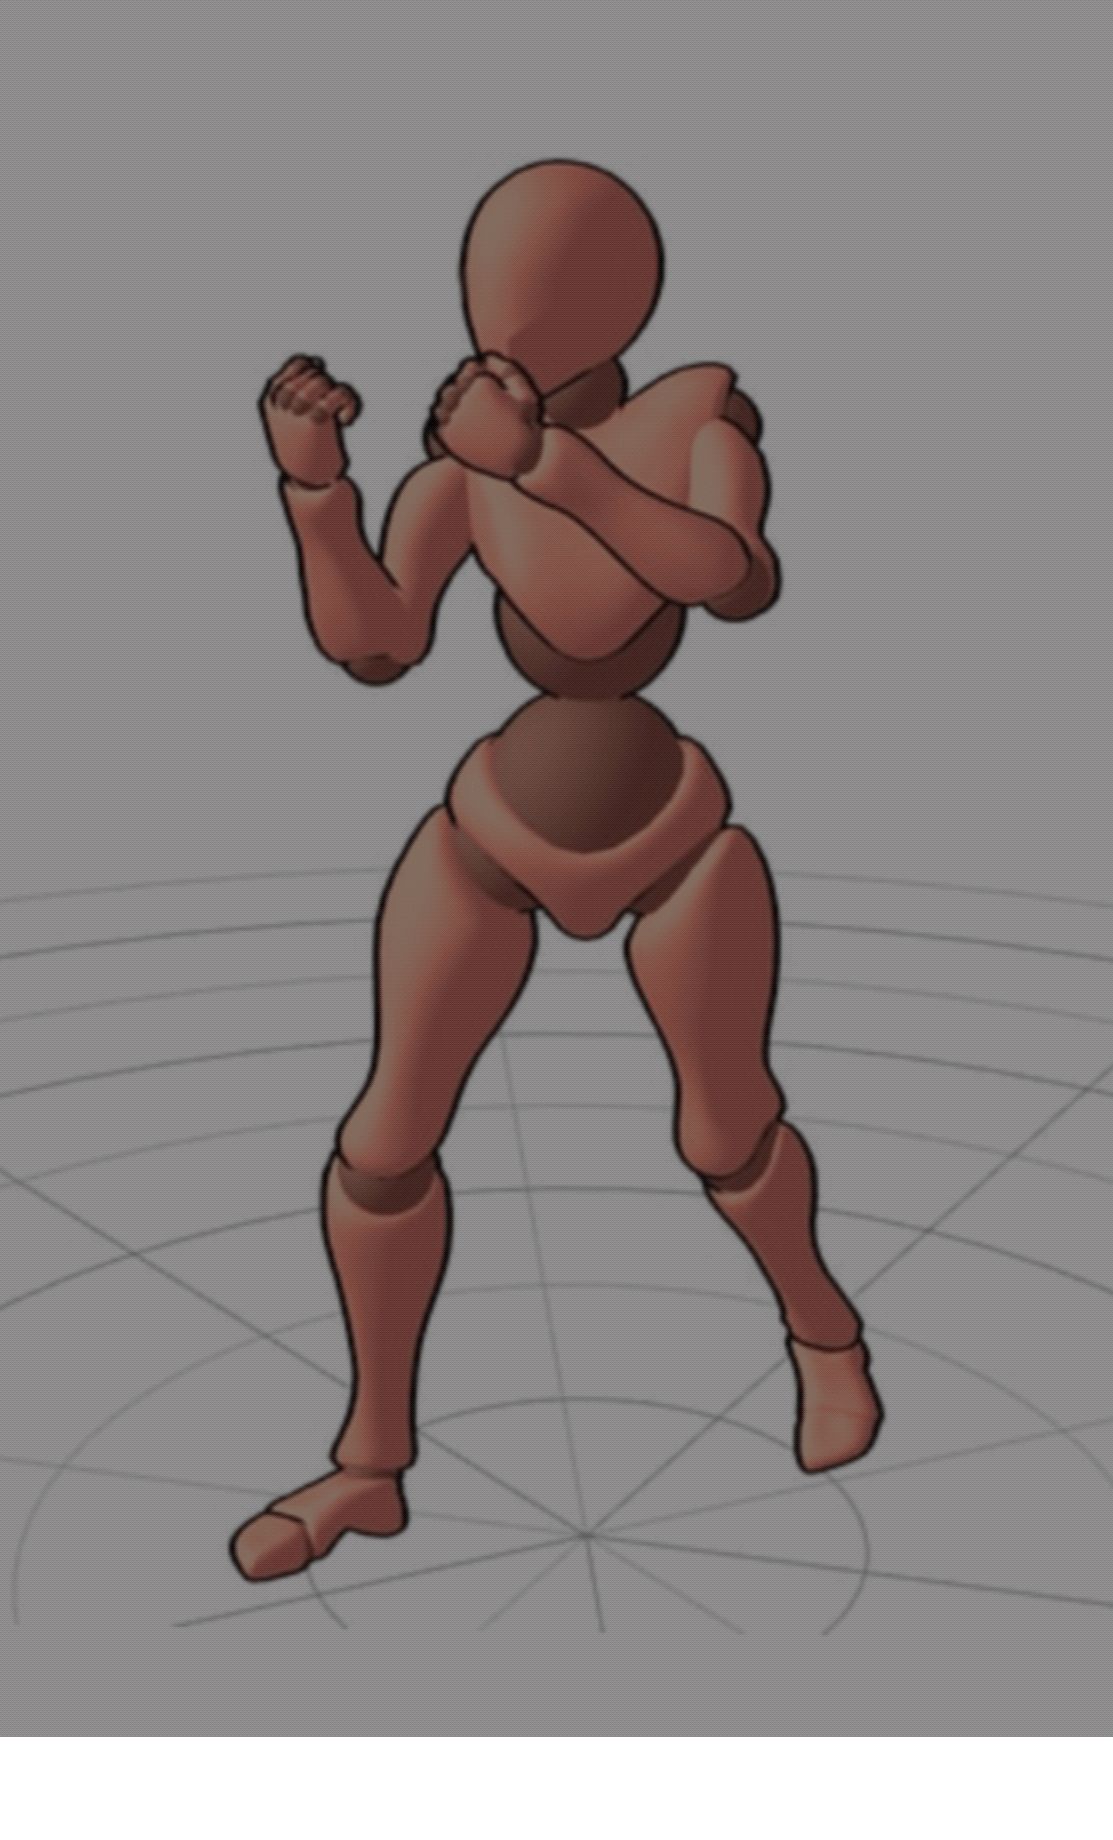
1 - Set up your pose in the JustSketchMe web app.
Take your time with this step and set your character in a pose that feels natural. Is the person you are sketching relaxed or tense? Are their shoulders raised? Does weight distribution make sense?
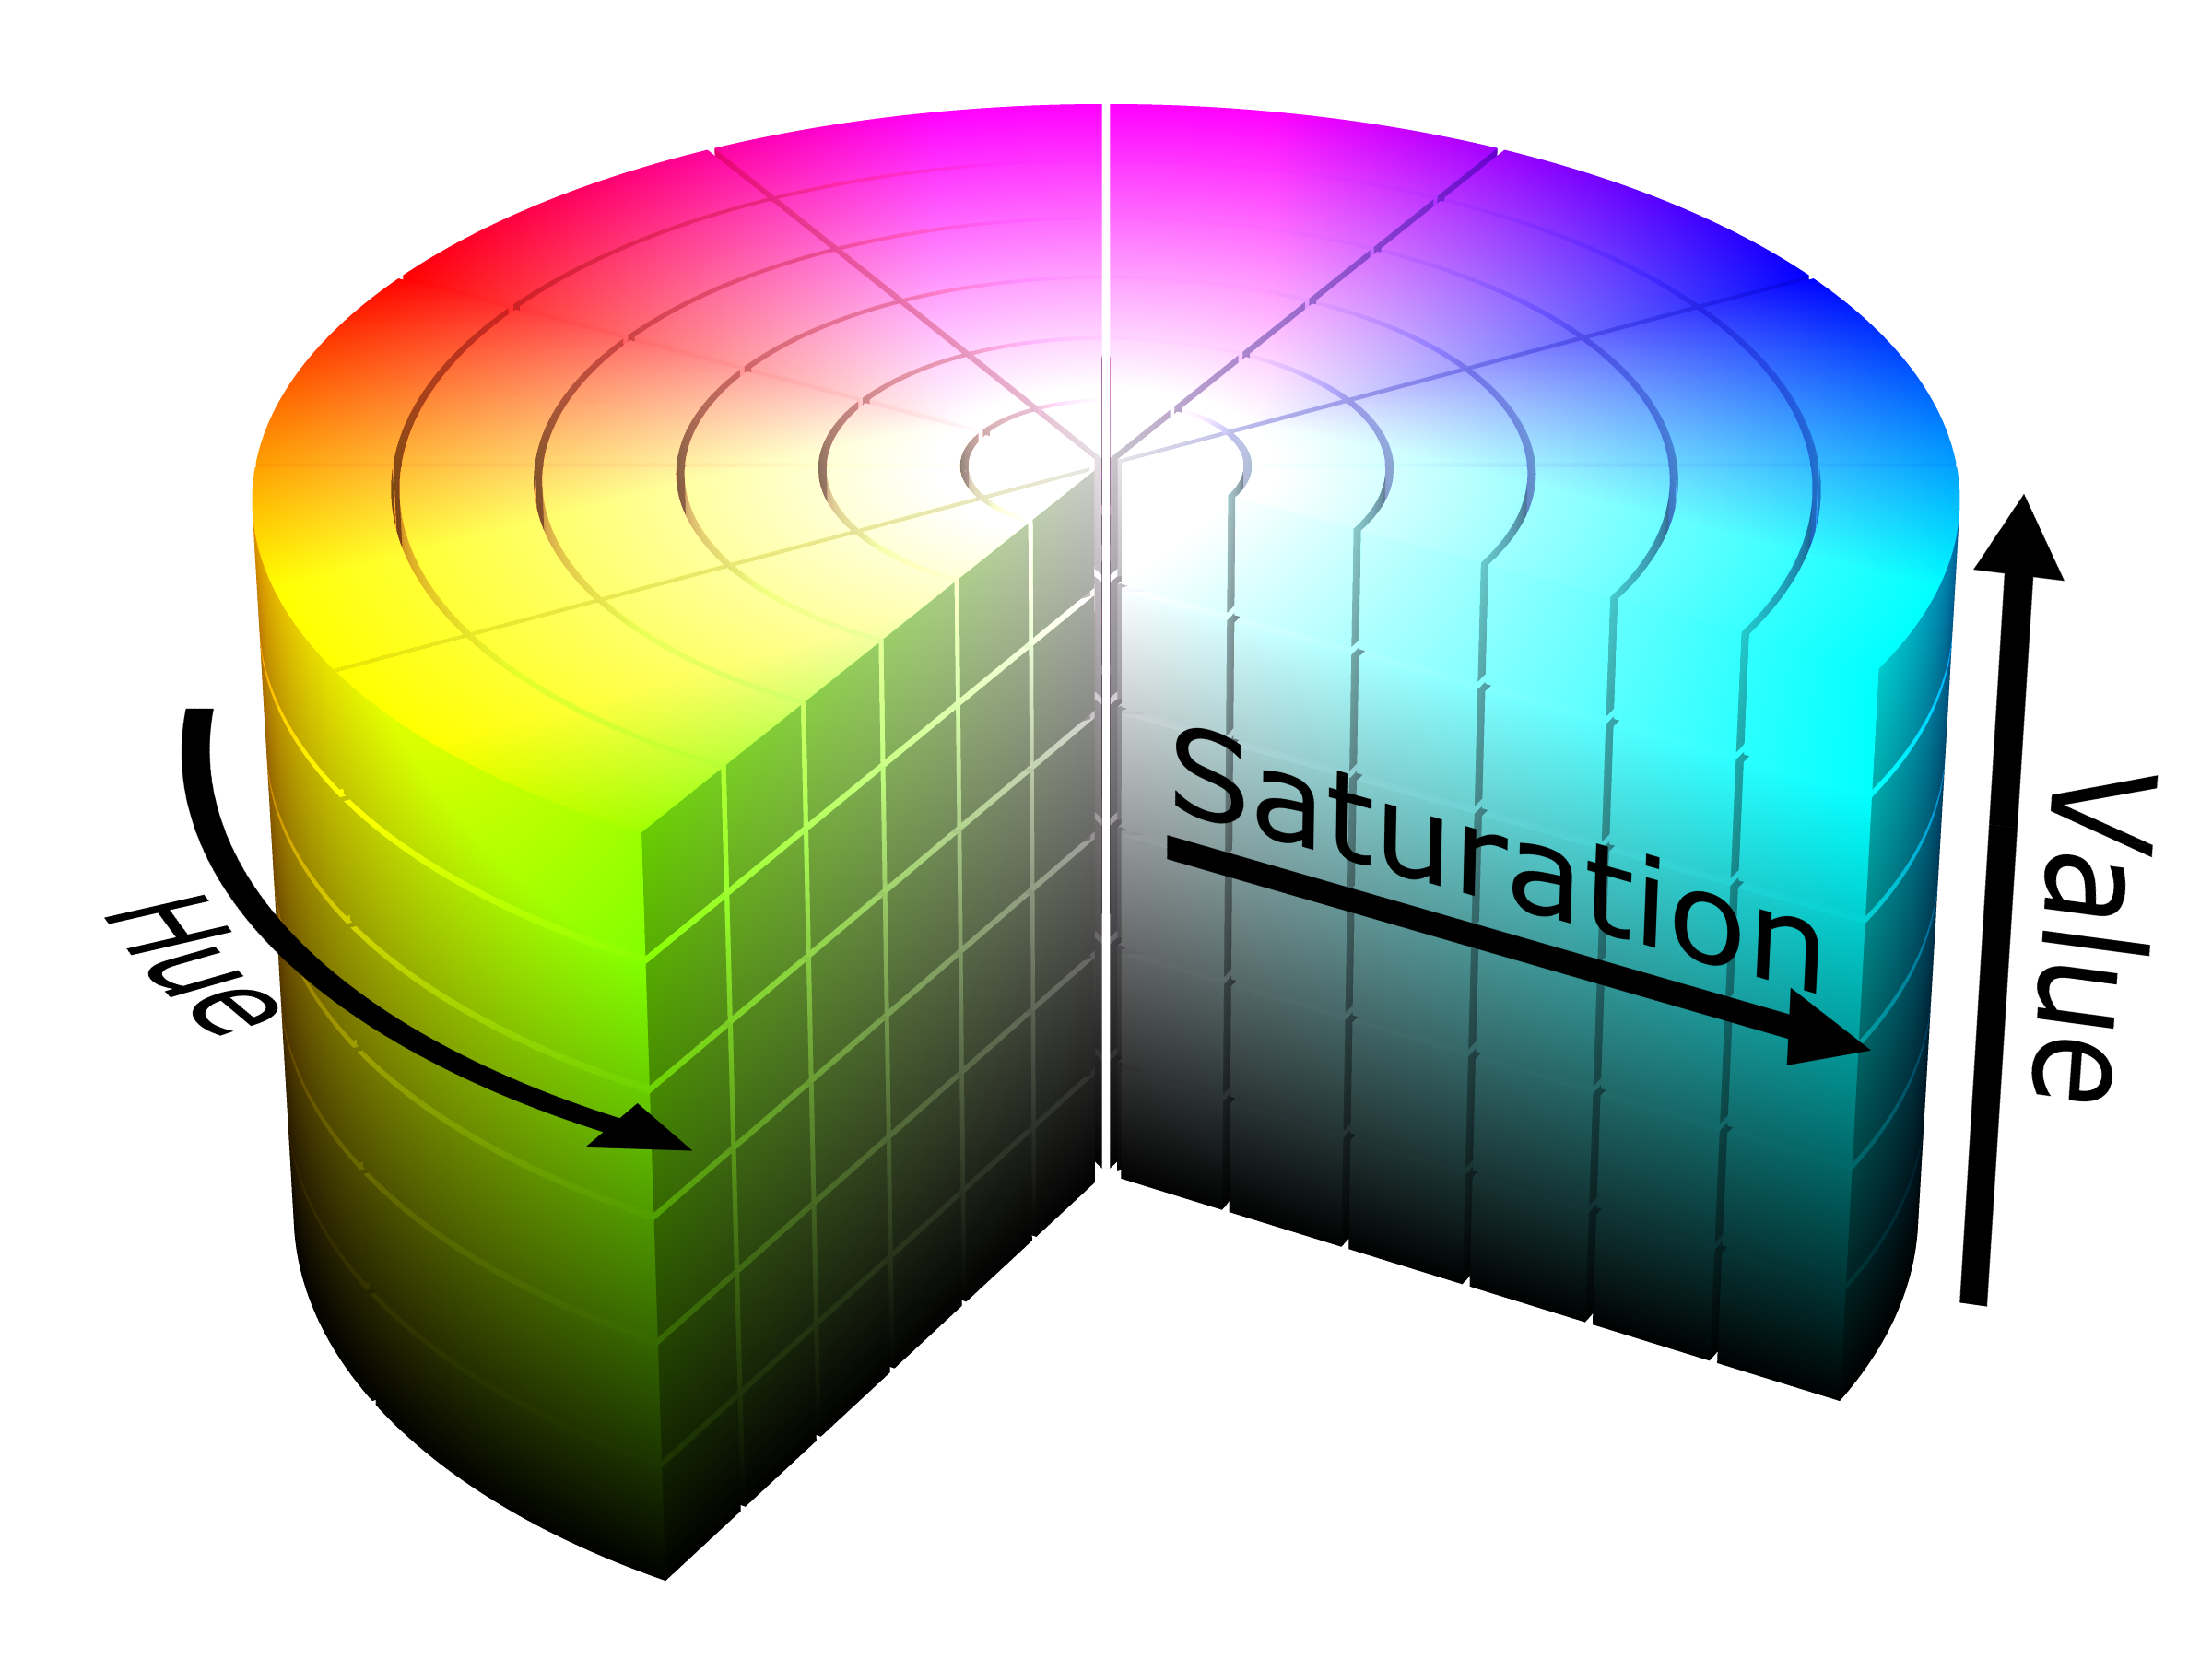
Try putting your body in that position, see how it feels, and modify the pose if necessary. If you want to get into some extra details, play around with the light source and choose the direction and intensity of the lighting.
When you’re happy with your posed character, take a screenshot and import it into your painting tool of choice, add it to a new layer and lower the opacity to 50%.
2 - Sketch out the outlines of the body noting the constituent shapes.
Select two sketch colours. I like red & bright blue as I’m less attached to what I’ve sketched with them, making it easier for me to erase and redo parts I’m not happy with. Drawing a red line with circles on the inside of the body helps get a sense of where the main gesture is, and using an outline helps get a sense of the silhouette.
Use the character to guide your proportions, keeping the shape of the person you’re hoping to sketch in mind. This includes the overall scale of the person (heavyset/skinny/muscular/emaciated). I'm going for a muscular female boxer with some determination!
If the pose is slightly more complex, you might want to add a third colour to draw some rough perspective lines. Make sure you have an idea of where the horizon line is. This will help to give your character some weight.
3 - Refine the outlines and connect them to create a more cohesive whole.
Now you can trace the outer edges of the body. See if you can get the lines to flow together naturally. Don’t worry about whether the lines are rough or sketchy. We’ll address that later. I like to flip my canvas to see if anything is off balance. Your brain tends to normalise aspects of the illustration when you keep it to one side, so be sure to flip the canvas frequently.
Now you can adjust the proportions of the body to make it more masculine or feminine (or whatever you have in mind). Masculine features include broader shoulders, chest, and waist with a blocky overall feel, whereas feminine features include narrower shoulders and chest, and broader hips and thighs with a softer, rounder overall feel.
Don't leave your hands and the face out for last. You should constantly be refining this too, as they are the most important elements of your drawing!
Here we can start adding in some details. Sketch in some rough hands, again nothing completely commital. We can also add the feet and ankles. You can spend some time on the facial features. At this point, your character is nearly fleshed out. It’s all about refinement.
4 - Add some clothes to your character.
Here you can start experimenting with clothes. Try a few variations of cut and style. How do the layers fall on the character? Is there any wind? Draw the rough shapes and add some rough detail lines. Get a nice feel for the overall image of the character.
I wanted my boxer lady to look sleek, and to show off her abs - so I gave her a training bra and some running shorts to keep it simple.
5 - Create a new layer and ink your lines, or refine already existing lines depending on your process.
This is my personal favourite part. The character has been created and decisions have been made, now it’s all about refining the look and feel of the character. Set the sketch layer to 50% opacity, create a new layer and choose your brush of choice to ink out your character.
I like to try and get smooth lines that flow into one another, but you can ink out the lines in whatever style you feel is good for your character.
If you're going for a more grungy or natural look, you may want to blend some of the lines into your existing drawing.

6 - Shade the character.
Well done! Your character is nearly completed! All we need to do is add some lighting.
Reference the JustSketchMe character you set up in step #1 and see where the light falls (or more importantly where it’s darker). Darken up the areas which need darkening. (If you want, change the overall colour of your canvas and add some lighter patches too.) Light adds a lot of important detail to your composition, and contrast really helps.
In this dynamic pose, I've considered which parts of her body are moving, otherwise, it might look quite stiff! So remember to add some blur to where your character might be moving.
7 - Finished!
If you enjoyed this tutorial share your finished creation with us on Instagram!